Rice krispie ice cream isn’t just a dessert—it’s the kind of treat that takes you back. One bite and suddenly you’re sitting on the porch, probably barefoot, with sticky fingers and a face full of joy. It’s that perfect mash-up of crunchy cereal and creamy goodness that feels like summer in a scoop.
If you’ve ever had that late-night craving for something cold and crunchy, this recipe is gonna be your new obsession. Whether you’re a cereal fan, an ice cream junkie, or just someone who wants a low-effort, high-payoff treat, I’ve got you covered. And don’t worry, no fancy tools, no pro chef vibes needed. We’re keeping it real, keeping it fun, and definitely keeping it delicious.
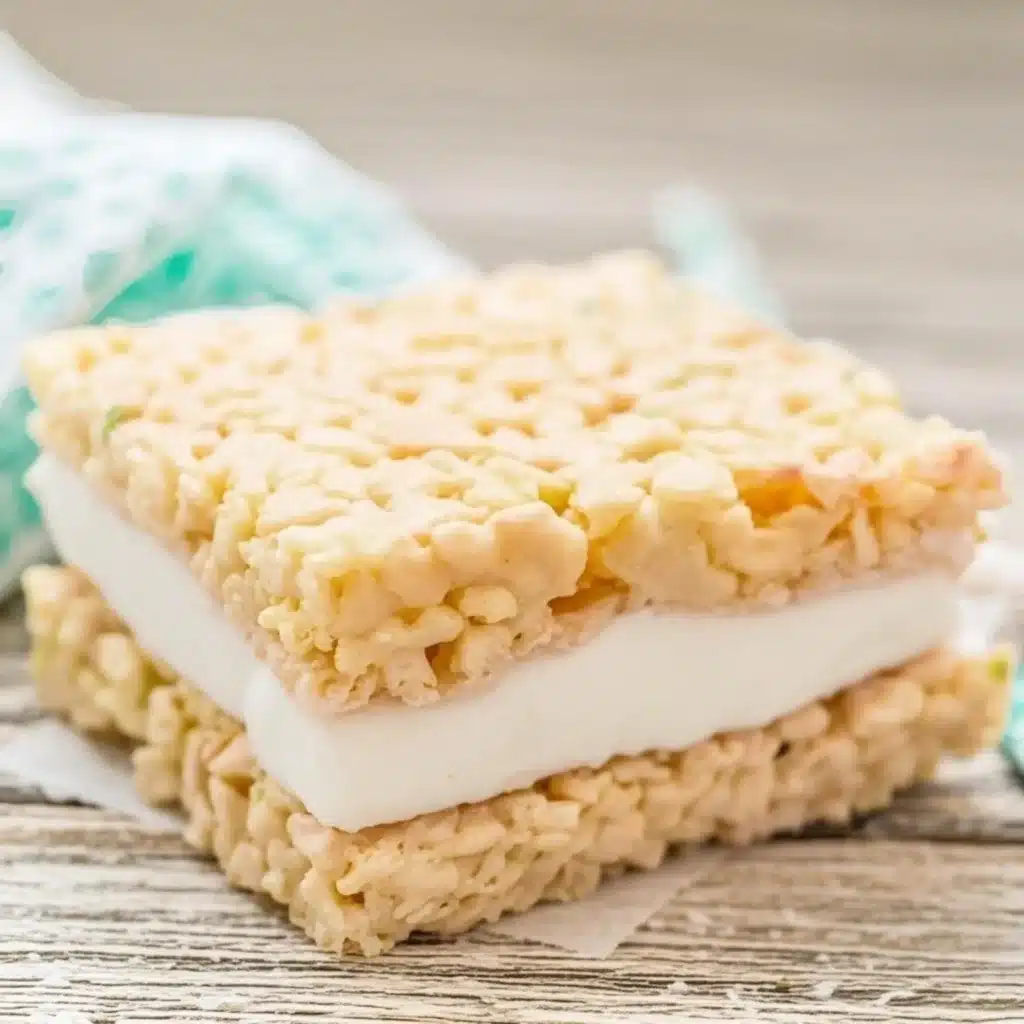
In this guide, you’ll learn how to make rice krispie ice cream from scratch (or give a major glow-up to store-bought), plus all the ways to remix it with flavors, sauces, and even cookies. Yes—rice krispie ice cream sandwiches are very much a thing. Let’s make it happen.
What Is Rice Krispie Ice Cream?
Let’s keep it simple—rice krispie ice cream is exactly what it sounds like. You take crispy puffed rice cereal (you know the kind), mix it into cold, creamy ice cream, and boom. You’ve got a treat that’s both smooth and crunchy. Some folks like to swirl in marshmallow fluff, while others go with chocolate chips or a peanut butter drizzle.
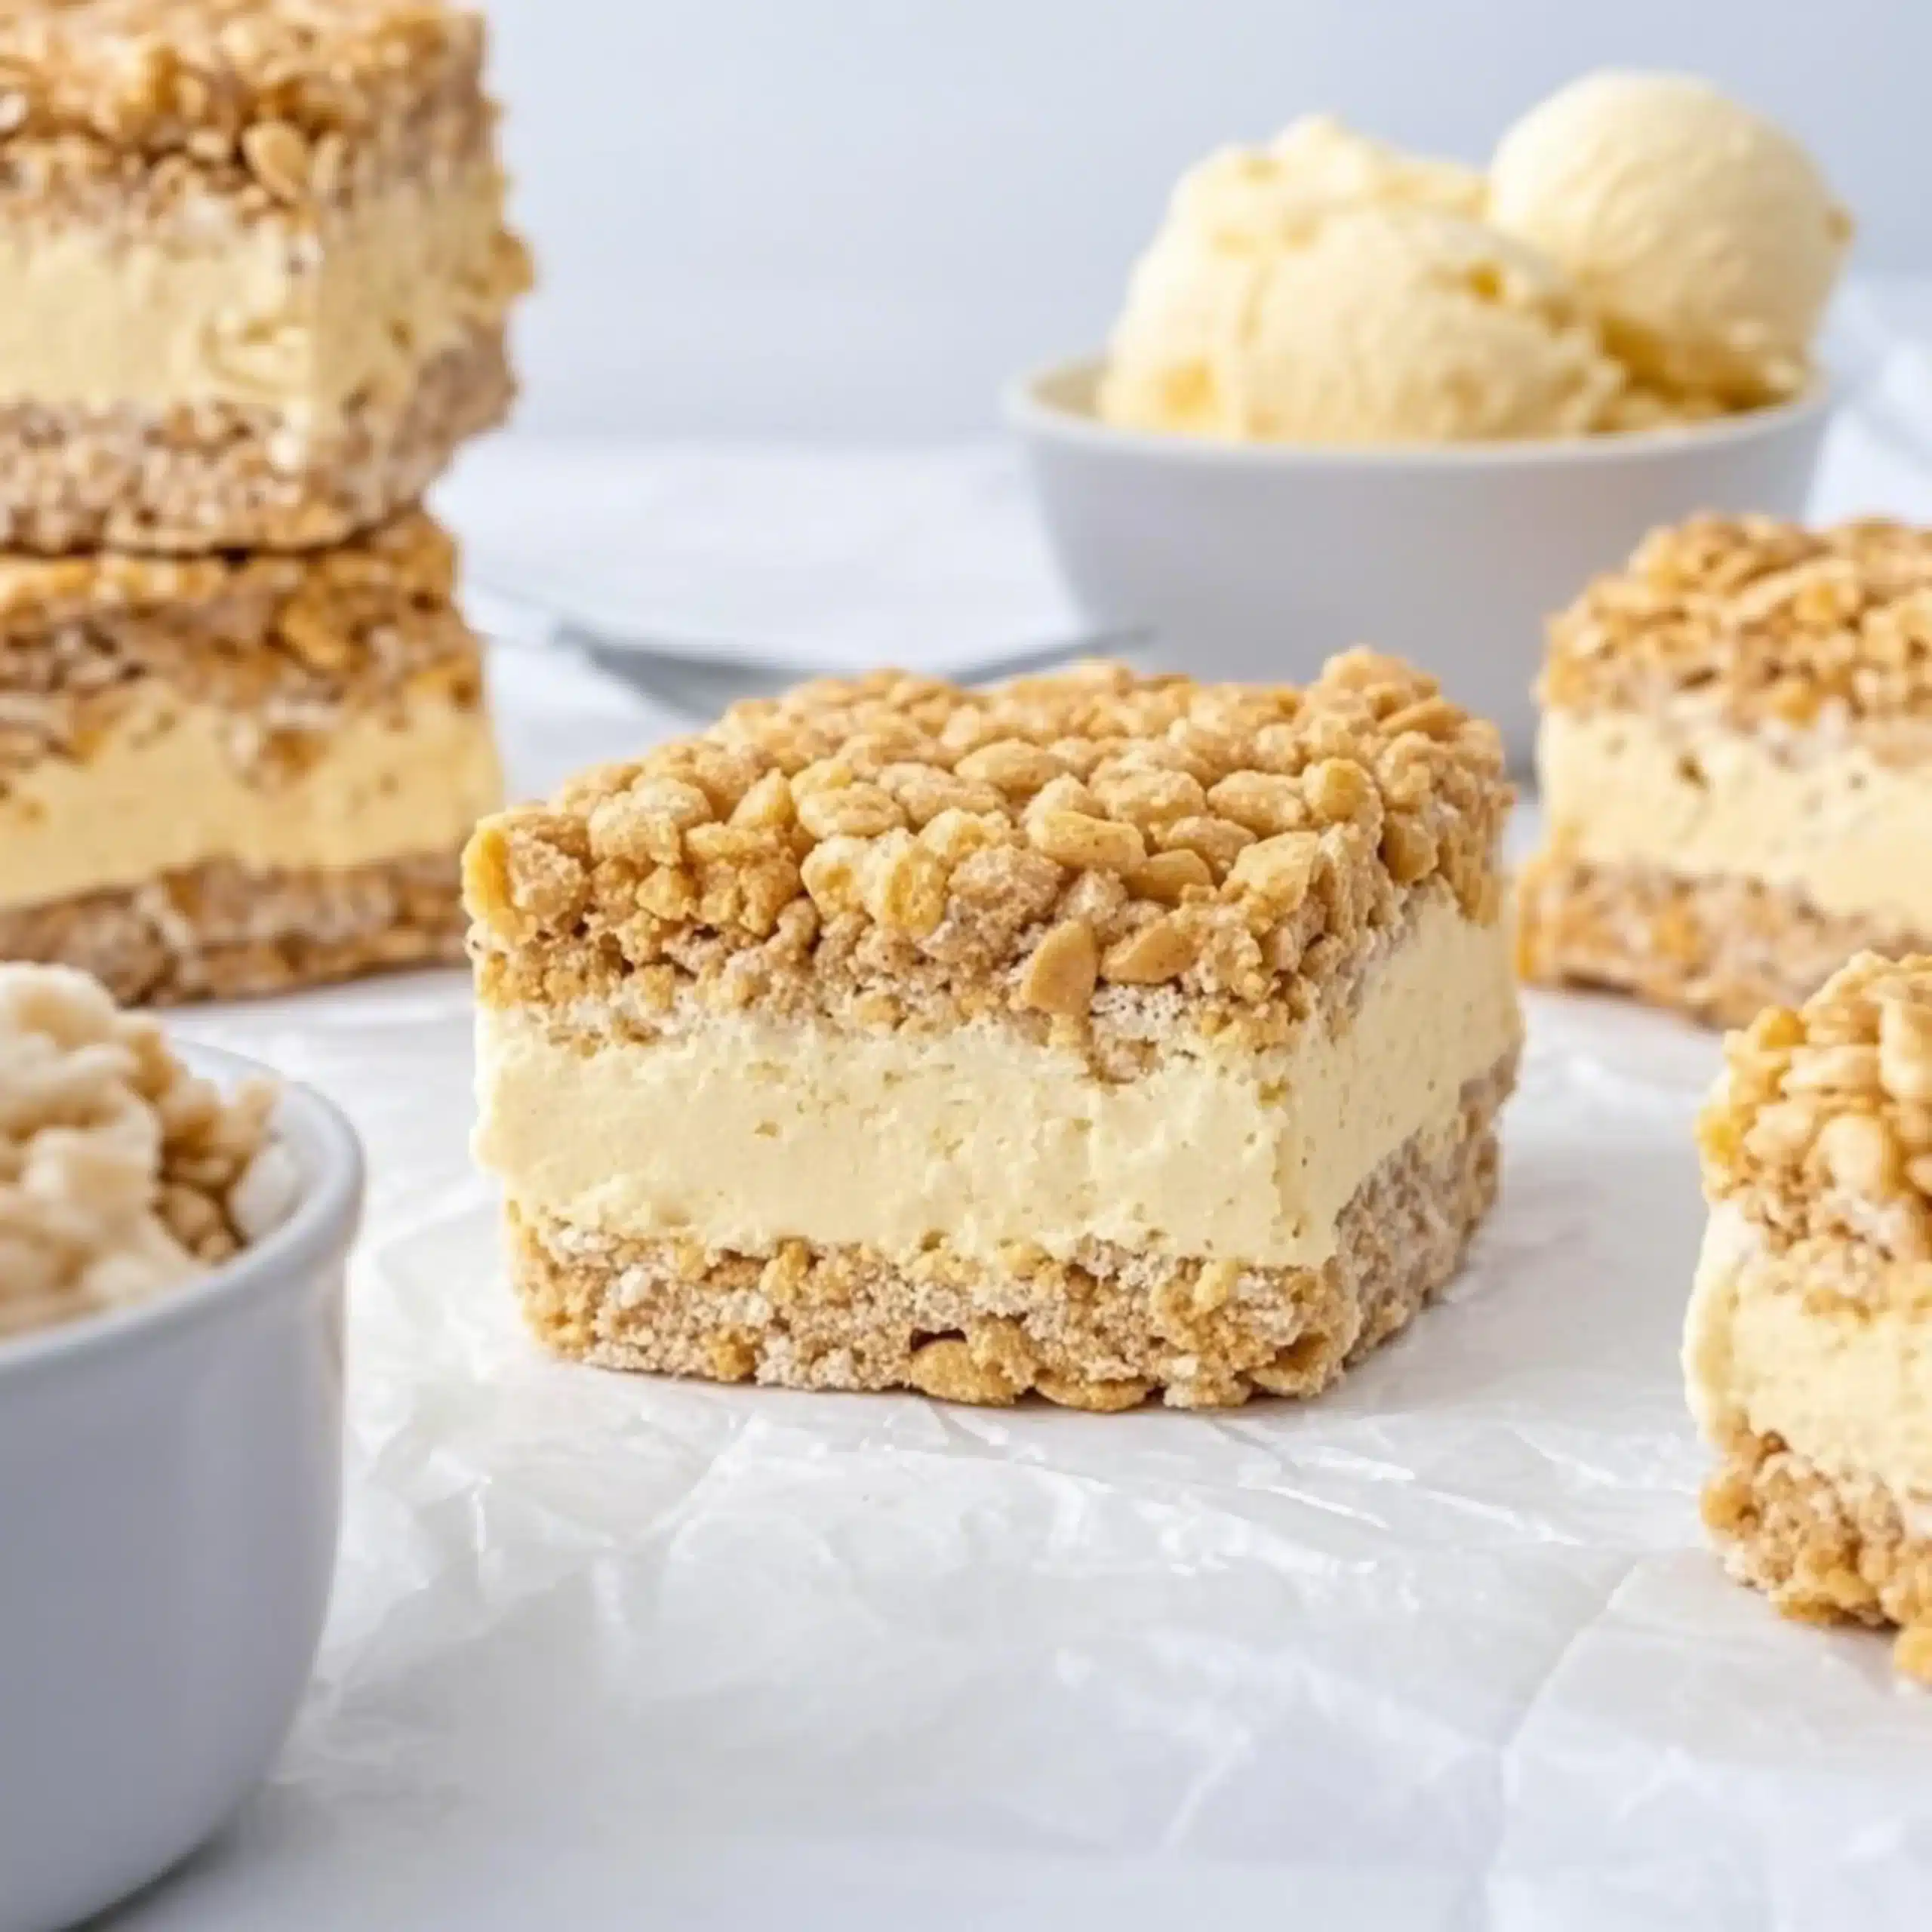
The cool thing about this dessert? It hits all the textures. You get that chill from the ice cream, that snap from the cereal, and if you want to go full nostalgia, you can even shape it into bars, sandwiches, or popsicles.
This isn’t some TikTok trend either. People have been mixing cereal into desserts forever. But rice krispies? They’re the GOAT for texture. No weird aftertaste, no sogginess (if you know how to do it right), just straight-up crunch in every bite.
Why Rice Krispie Ice Cream Works So Well
Okay, let’s break it down. Why does this combo slap so hard?
- Texture contrast – Creamy ice cream, crunchy cereal. It’s the classic duo, and it works every time.
- Kid-approved, adult-obsessed – It’s sweet and simple enough for little ones, but you can totally fancy it up.
- Budget-friendly – No need for artisanal ingredients. Just grab a box of cereal and whatever ice cream you like.
- Super versatile – Use chocolate cereal, swirl in caramel, sandwich it between cookies… You get the idea.
And here’s the secret: toast those rice krispies first. Seriously. Toss ‘em in a dry pan for like 2–3 minutes and they’ll hold their crunch way longer. You’ll thank me later.
Ingredients for Rice Krispie Ice Cream
You don’t need much for this recipe—and you can mix and match as much as you want. Here’s a solid starter list:
Ice Cream Base Options
You’ve got choices here:
- Vanilla no-churn – Whip some cream, fold in condensed milk, boom—ice cream.
- Custard-style – Go old-school with egg yolks, cream, and sugar.
- Store-bought – Ain’t no shame in this game. Grab a pint of your favorite brand and remix it.
Rice Krispies and Cereal Substitutes
- Classic Rice Krispies – The standard. Toast ‘em for extra crunch.
- Cocoa Krispies – Chocolate version for dessert vibes.
- Puffed quinoa or millet – Healthier spin that still snaps.
Flavor Add-Ins and Swirls
- Mini marshmallows
- Peanut butter chips
- Crushed chocolate sandwich cookies
- Caramel or fudge ripple
- Fresh berries (if you wanna pretend it’s healthy)
How to Make Homemade Rice Krispie Ice Cream (Without Getting Soggy Cereal)
Let’s get one thing straight—nobody wants soggy cereal in their ice cream. So here’s how we keep things crispy, cool, and craveable with this rice krispie ice cream recipe.
Step 1: Toast the Rice Krispies (Trust Me)
Alright, if there’s one step you don’t skip, it’s this one. Toasting the cereal makes a huge difference. It pulls out extra moisture and gives it that deep, nutty crunch that actually lasts in the freezer.
How to toast:
- Dump 2 cups of Rice Krispies into a dry skillet or nonstick pan.
- Heat on medium, stir constantly for 2–3 minutes.
- You’ll smell that warm, popcorn-y scent—stop before they darken too much.
- Let them cool completely before mixing in.
Step 2: Make Your Ice Cream Base
You’ve got three legit options here. Choose your vibe:
1. No-Churn Vanilla Ice Cream (Quick & Easy)
Mix 2 cups of heavy cream until stiff peaks form. In another bowl, whisk a 14-oz can of sweetened condensed milk with 1 tsp vanilla extract. Gently fold the cream into the milk mixture until smooth and fluffy. Boom—ice cream base ready.
2. Custard-Style (Rich & Creamy)
Go this route if you’re feeling fancy. Egg yolks, sugar, and cream cooked into a custard, then chilled and churned. Great base if you want that old-school ice cream shop flavor.
3. Store-Bought Shortcut
No shame in the freezer game. Soften a pint of your favorite vanilla (or chocolate!) for 5–10 minutes. Then mix in your cereal and extras. Done.
Step 3: Fold in the Toasted Cereal + Flavor Swirls
Once your base is ready and your Rice Krispies are cooled, it’s time for the fun part.
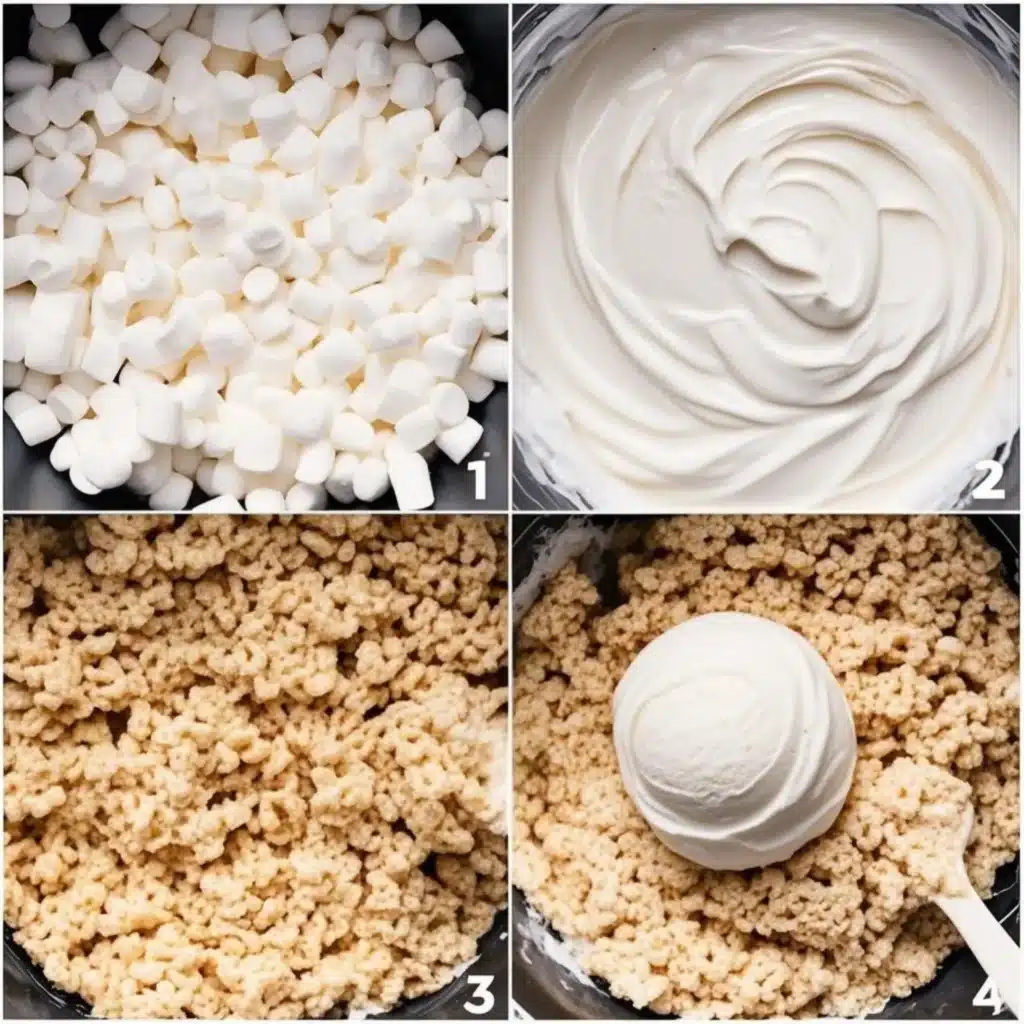
Folding technique:
Use a spatula to gently fold cereal into the base. Don’t stir like you’re beating eggs—you’ll crush the cereal and deflate the ice cream.
Flavor swirls to try:
- Caramel ribbon – Just drizzle as you fold.
- Chocolate fudge swirl – Microwave a spoonful of hot fudge for 5 seconds.
- Peanut butter ripple – Thin it with a little milk for easy mixing.
Mix-ins? Toss in mini marshmallows, chopped candy bars, or even bits of chocolate chip cookies for the full-blown dessert bomb.
Step 4: Layer + Freeze
Transfer everything into a loaf pan or freezer-safe container. You can add more cereal on top for crunch. Wrap it in plastic wrap or seal with a lid.
Freeze for at least 4 hours—overnight is best for that firm scoopable texture.
Flavor Variations for Rice Krispie Ice Cream That Hit Different
Why stop at basic when you can get wild? Try one of these killer combos for your next batch.
Classic Vanilla with Marshmallow Swirl
Like a frozen Rice Krispie treat. Mix in toasted cereal and swirl in fluff. Top with more cereal for crunch.
Chocolate Peanut Butter Crunch
Use chocolate ice cream, fold in PB chips, toasted cocoa krispies, and a swirl of melted peanut butter.
Berry Cream Crunch
Vanilla base, swirl in raspberry jam, and toss in some fresh or frozen raspberries. Perfect summer scoop.
Salted Caramel Apple
Cinnamon ice cream base, toasted Rice Krispies, diced apple chunks sautéed in brown sugar. Add salted caramel drizzle. Total fall vibes.
How to Make a Rice Krispie Ice Cream Sandwich (Yes, It’s a Thing)
You’ve got your dreamy, crunchy rice krispie ice cream ready to go—so what’s next? Let’s talk sandwiches. But not just any ice cream sandwich. We’re talking rice krispie ice cream sandwiches, and they’re everything your inner 10-year-old ever wanted (and your grown-up taste buds will thank you too).
The Ice Cream Sandwich Blueprint
There are two ways to pull this off—both easy, both ridiculously good.
Option 1: Rice Krispie Treat Shells
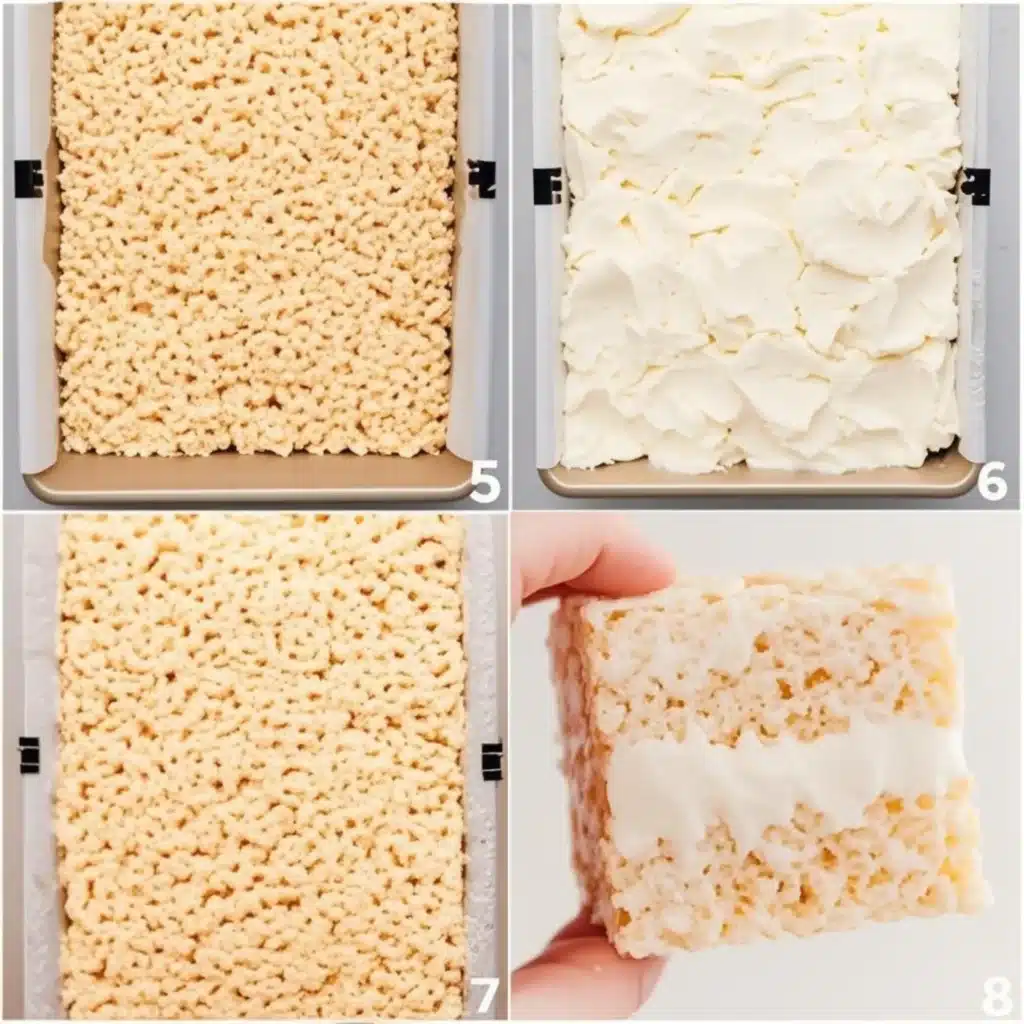
This one’s a twist on the classic treat. You’ll make the usual marshmallow-and-cereal bars, but instead of cutting into squares, you’ll form them into sandwich layers.
How to do it:
- Make your Rice Krispie treats using the standard 3-ingredient recipe (cereal, butter, marshmallows).
- Press half the mix into a lined sheet pan and flatten evenly.
- Chill for 20 minutes, then cut out circles or squares.
- Scoop your rice krispie ice cream onto one half, top with another, and press gently.
Wrap ‘em up in parchment and freeze again for that perfect bite.
Option 2: Use Cookies as the “Bread”
Want something even simpler? Use your favorite cookies and sandwich that cereal-infused ice cream between them. Chocolate chip cookies or snickerdoodles work like a charm. You’ll get that crunch from the cereal and soft chew from the cookie—best of both worlds.
Pro Tips for Sandwich Success
- Don’t overfill. Ice cream will ooze out the sides if you go overboard. Use a cookie scoop for uniform size.
- Freeze before serving. Once assembled, freeze for another hour so they don’t melt in your hands.
- Wrap individually. Parchment paper or wax paper helps keep everything neat (and looks cute if you’re serving them at a party).
Serving Suggestions & Perfect Pairings
Whether you’re scooping or sandwiching, here’s how to take your rice krispie ice cream experience up a notch.
Toppings That Work Every Time
- Hot fudge drizzle
- Crushed Oreos
- Chopped nuts
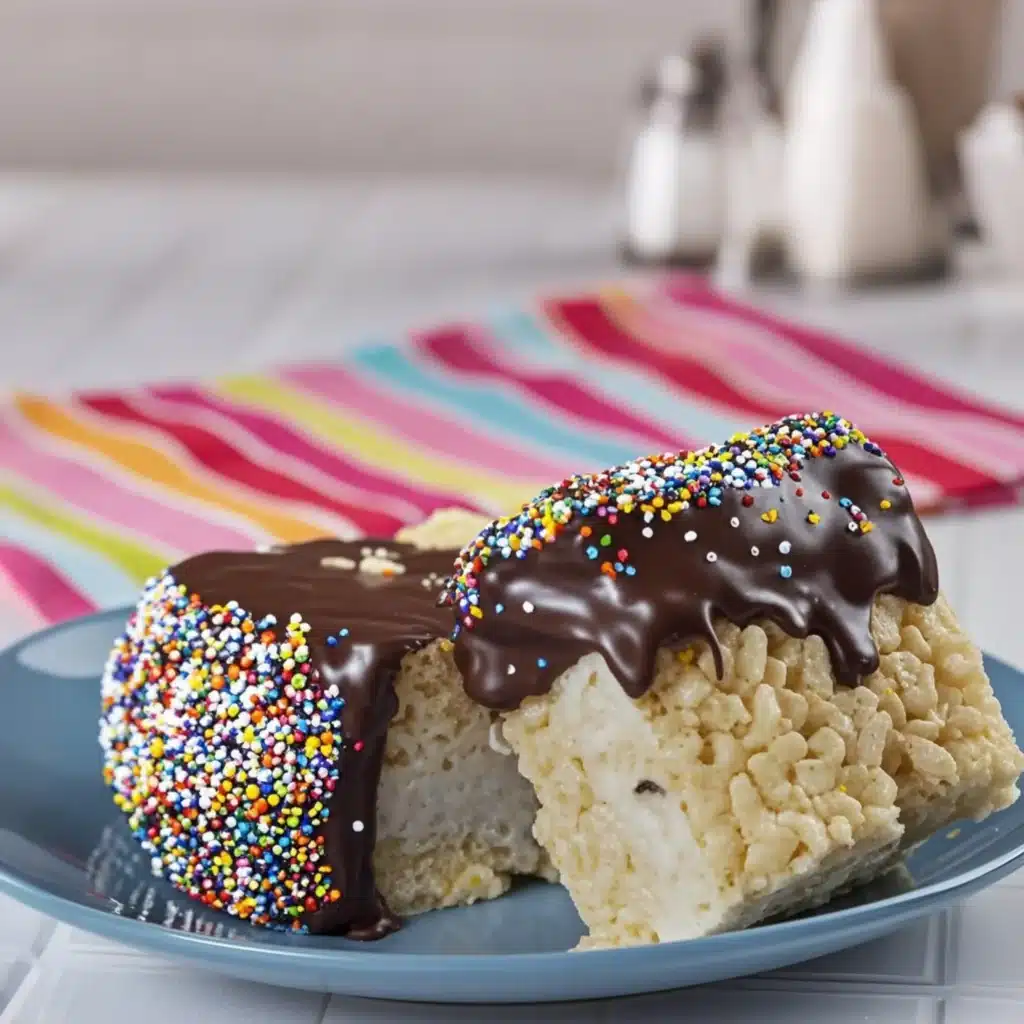
- Rainbow sprinkles
- Salted caramel syrup
Top it like a sundae or go minimal with just a dash of sea salt for that salty-sweet finish.
What to Serve It With
- Grilled fruit – Like caramelized peaches or pineapple.
- Mini pies – Ice cream + warm pie = undefeated combo.
- Iced coffee – Seriously, a cold brew float with rice krispie ice cream is the move.
If you’re feelin’ real wild, pair it with this Cream of Mushroom Chicken and Rice before dessert, or use this for dessert after a Leftover Rotisserie Chicken Recipe. Comfort food all the way.
How to Store Rice Krispie Ice Cream and Keep It Crunchy
Alright, so you’ve made the magic happen—your homemade rice krispie ice cream is in the freezer, but now what? You want it to stay scoopable, creamy, and most importantly, crunchy. Nobody wants soggy cereal sitting in a frosty mess.
Here’s how to store it like a pro and make sure every bite still has that crispy snap.
Best Containers for Freezing
Use an airtight, freezer-safe container—something like:
- A metal loaf pan (cover it with plastic wrap and foil)
- Tupperware or freezer-safe silicone tubs with tight lids
- Glass containers with locking lids
Why airtight? Because freezer burn is a flavor killer. A tight seal keeps your ice cream creamy instead of icy.
Preventing Cereal Sog
Even toasted cereal can lose its crunch after a few days. Here’s how to slow that down:
- Cool before freezing: Let your ice cream sit in the fridge for 15 minutes before it hits the deep freeze. It sets up better that way.
- Layer with parchment: If you’re adding cereal throughout, layering your ice cream with thin sheets of parchment helps hold structure and reduce ice crystal formation.
- Add a fresh cereal topper: Before serving, sprinkle a few toasted rice krispies on top to bring back that crunchy vibe.
How Long Will It Last in the Freezer?
- Best quality: Within the first 7–10 days
- Still good: Up to 1 month
- After that, it might start picking up those weird freezer smells and lose that perfect texture.
Re-Scooping Tips: How to Get the Creamy Texture Back
Ever tried to scoop homemade ice cream straight from the freezer and ended up bending your spoon? Yeah, don’t do that.
Here’s how to make life easier:
- Let it sit out at room temp for 5–10 minutes.
- Dip your scoop in warm water between scoops.
- If it’s too hard, zap it in the microwave (no lid!) for 10 seconds max. Just enough to loosen up the edges.
What to Do With Leftover Rice Krispie Ice Cream
If by some miracle you didn’t eat the whole thing in one night, here are some ideas:
1. Rice Krispie Ice Cream Pops
Scoop into silicone molds, stick in a popsicle stick, and refreeze. Great for kids (or, you know, snack attacks after midnight).
2. Dessert Parfaits
Layer it with whipped cream, berries, and crushed cereal for a pretty parfait that looks all fancy but takes 5 minutes.
3. Ice Cream Tacos
Use a soft shell (or even a waffle folded in half), stuff with ice cream, drizzle with chocolate, and freeze.
4. Mix into Milkshakes
Scoop some into a blender with milk and extra cereal—hello, crunchy milkshake. It’s like the cereal milk trend, but frozen.
And hey, if you love creative dessert spins, you might like this fun twist on the Crumbl Cookie Recipe—another totally over-the-top sweet worth trying with your leftover ice cream.
Nutrition Info, Allergy Swaps, and Smart Serving Tips for Rice Krispie Ice Cream
Let’s talk about the real stuff—what’s actually in each scoop, who can eat it, and how you can tweak it to fit your lifestyle. This section breaks it all down with real numbers, easy swaps, and ways to serve this sweet treat up without second guessing.
Rice Krispie Ice Cream: Nutrition Facts (Per ½ Cup Serving)
Note: This estimate is based on a standard no-churn vanilla ice cream base with toasted Rice Krispies added.
| Nutrient | Amount |
|---|---|
| Calories | 250–320 |
| Fat | 18g |
| Saturated Fat | 10g |
| Carbohydrates | 28g |
| Sugar | 22g |
| Protein | 3g |
| Sodium | 85mg |
Heads up:
Calories and sugar will jump if you’re swirling in caramel, fudge, or adding cookies. But that’s kinda the point, right?
Dietary Swaps: How to Make It Fit Your Needs
Wanna lighten it up or go dairy-free? No problem. Here’s how:
1. Dairy-Free Version
Swap this:
- Use coconut cream or oat milk whipped topping in place of heavy cream
- Try condensed coconut milk or a dairy-free sweetened condensed milk
Pro tip: Coconut-based versions taste awesome with tropical mix-ins like pineapple or toasted coconut flakes.
2. Low-Sugar or Keto-Friendly
Swap this:
- Use a sugar-free sweetened condensed milk (like ones made with erythritol or monk fruit)
- Toast a low-carb cereal alternative (yup, they exist!)
Ice cream texture won’t be quite the same, but you’ll get that cold, creamy vibe without the sugar crash.
3. Gluten-Free
The cereal is the trick here—most original Rice Krispies have barley malt, which contains gluten. Go for a certified gluten-free crispy rice cereal instead. Several brands make ‘em now and they work great in this recipe.
Best Serving Sizes
For adults, ½ cup to 1 cup is the sweet spot.
Kids? Keep it to ½ cup or smaller—especially if they’re loading it with toppings.
Hosting a party or BBQ? Pre-scoop and freeze in muffin liners or cupcake wrappers for grab-and-go servings. It’s a game-changer for mess-free serving.
Want to Make It Ahead?
How far ahead can you prep?
You can make and freeze your rice krispie ice cream up to 2 weeks in advance if you seal it tight and keep it away from freezer door traffic (opening/closing causes those dreaded ice crystals).
For sandwiches:
Wrap individually and freeze. Pull out 10–15 minutes before serving so they’re just the right amount of soft.
When to Serve It
This dessert fits just about every vibe:
- Birthday parties
- Summer BBQs
- After-school treats
- Date-night dessert
- “Just because it’s Tuesday” scoops
It’s casual but still feels like a little celebration in every bite.
Rice Krispie Ice Cream
Ingredients
Method
- In a pan over medium heat, melt butter and add brown sugar.
- Stir in Rice Krispies and toast for 2–3 minutes until golden.
- Set aside to cool completely.
- In a bowl, mix heavy cream, milk, sugar, and vanilla until sugar dissolves.
- Pour mixture into an ice cream maker and churn according to the manufacturer’s instructions.
- During the last few minutes of churning, add the toasted Rice Krispies.
- Transfer to a container and freeze for at least 4 hours before serving.
Nutrition
Notes
Tried this recipe?
Let us know how it was!Final Thoughts: Why Rice Krispie Ice Cream Needs to Be in Your Freezer
So, let’s be real—rice krispie ice cream hits the sweet spot between nostalgic cereal vibes and that creamy, dreamy texture we all crave in a frozen treat. Whether you’re scooping it into cones, sandwiching it between cookies, or just sneaking spoonfuls straight from the freezer (no shame), this dessert brings a fun twist to classic ice cream.
You don’t need fancy machines. You don’t need hours in the kitchen. What you get is a sweet, simple recipe that delivers every time—with crunch, with flavor, and with all the feel-good energy of a childhood throwback.
Homemade treats don’t need to be complicated. They just need to make you smile. And this one? It’s a total winner.
LET’S STAY CONNECTED! FOLLOW ME ON:
Tried this recipe? I’d be thrilled to see your take on it! Snap a pic and tag me @Sweftyrecipes so I can share your delicious creations with our foodie community.
